How to Remove a Laundry Chute
The Unspoken Necessity: Removing Laundry Chutes from Modern Homes
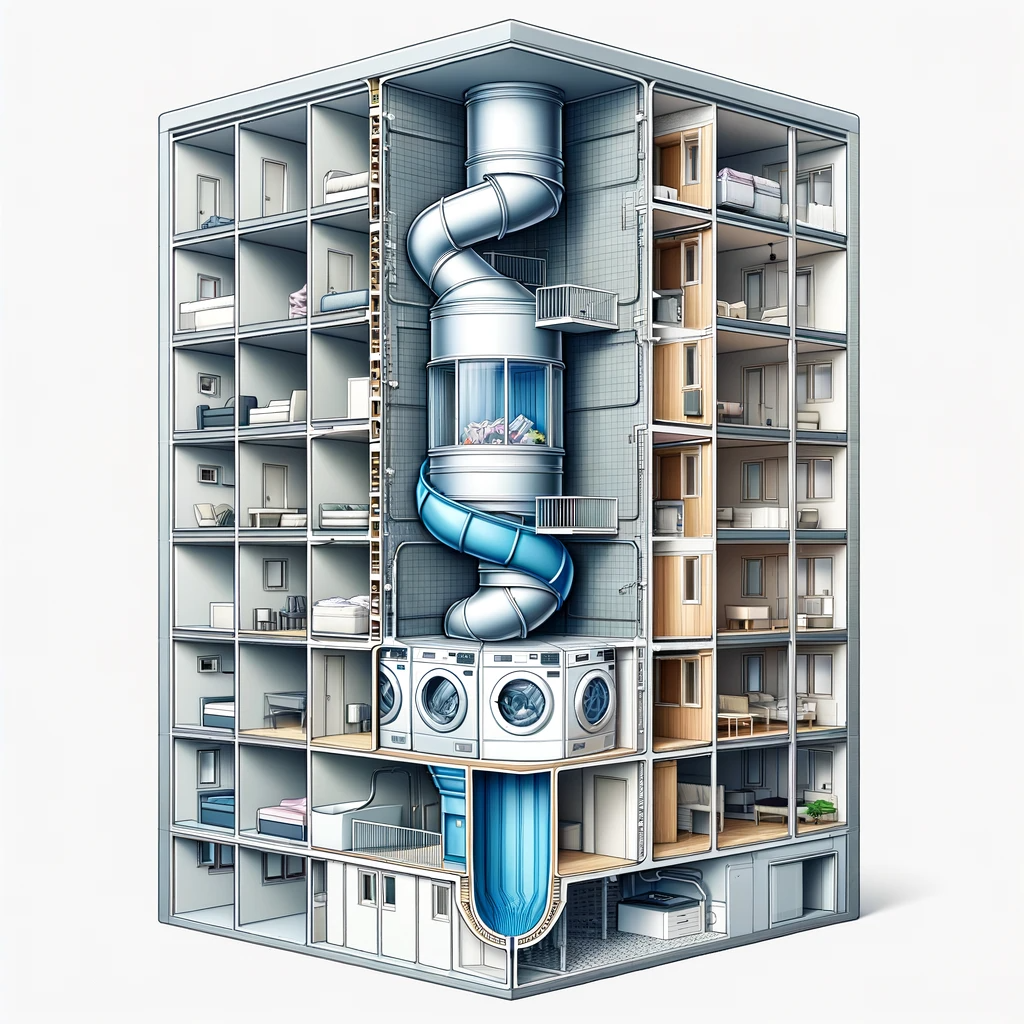
We sometimes don't talk about it, but sometimes laundry chutes need to be removed. This need can arise from various reasons - from remodeling projects that repurpose the space to safety concerns in households with small children or pets. Additionally, as home layouts evolve and the use of space becomes more dynamic, these once-useful passageways may become obsolete or even intrusive. In these instances, removing a laundry chute isn't just about reclaiming space; it's about adapting our homes to fit our changing lifestyles and needs, ensuring safety, and optimizing functionality for today's living standards.
What Will This Article Cover?
This article will cover 5 points:
- Assessment and Planning: Before removing a laundry chute, it's important to assess its structure and how it's integrated into the home. Consider if it's made of duct work and its proximity to electrical outlets and plumbing.
- Consultation with Professionals: In some cases, the chute might be part of a heating or cooling system. It's recommended to consult with a heating and AC technician before removal to ensure it's not a necessary component of your home's system.
- Physical Removal: The basic approach to removing a laundry chute is to cut it out. This may involve cutting surrounding drywall and pulling out the chute, especially if it's exposed in areas like a garage.
- Handling Structural and Insulation Issues: After removing the chute, there will be gaps that need to be sealed for insulation and structural integrity. Installing insulation and drywall over these holes is a standard practice.
- Size and Location Considerations: The size and location of the chute can affect the ease of removal. For example, if the chute is small or located in an inconvenient area, it might be more challenging to remove.
Assessment and Planning: Preparing to Remove Your Laundry Chute
Introduction
Removing a laundry chute from your home can seem like a straightforward task, but it requires careful planning and assessment. This process is not just about dismantling; it's about understanding the intricate ways in which the chute is integrated into the structure of your house. Let's delve into the first crucial step of this process: Assessment and Planning.
Understanding the Structure of Your Laundry Chute
Identifying the Material
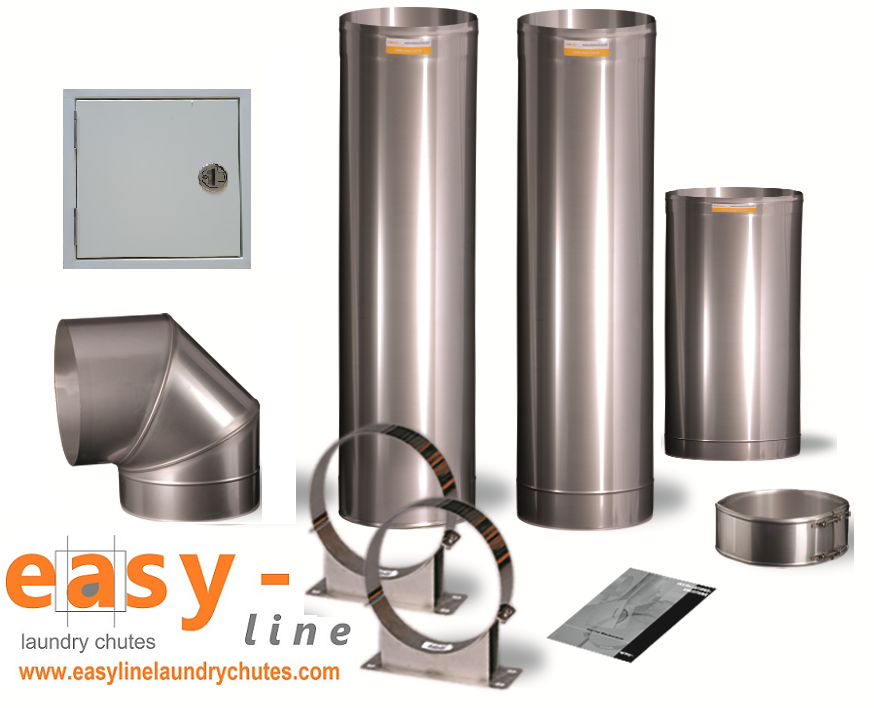
The material of your laundry chute has significant implications for its removal. Many older homes feature chutes made from duct work, which presents a different set of challenges compared to wood or other materials. Duct work, typically metal, might require tools suitable for cutting through metal and may involve sharp edges that necessitate safety precautions.
Examining Integration with the Home
Laundry chutes are not standalone structures. They are integrated into the walls and floors of your home, often running through multiple levels. It's essential to determine how the chute is attached to these structures. Is it screwed into the wall studs or joists? Is it built into the framing of the house? The answers to these questions will guide your approach to safely and effectively removing the chute.
Proximity to Electrical and Plumbing
One of the key aspects to assess is the laundry chute's proximity to electrical outlets and plumbing. This step is crucial for safety reasons and to avoid accidentally damaging essential services.
Electrical Considerations
If the chute is near electrical outlets or wiring, extra care is needed. There's a risk of cutting into wires, which can be dangerous and lead to costly repairs. It's wise to consult with an electrician if you're unsure about the electrical setup around the chute.
Plumbing Concerns
Similarly, if the chute is close to plumbing, particularly in older homes where plumbing might not be as predictable, there's a risk of damaging pipes. Accidentally cutting into a water pipe can cause flooding and water damage. Understanding the layout of your plumbing is vital before beginning the removal process.
Conclusion
The first step in removing your laundry chute is a comprehensive assessment and planning phase. This involves understanding the material of the chute, its integration into your home's structure, and its proximity to electrical and plumbing systems. By thoroughly evaluating these factors, you can ensure a safe and effective removal process, setting a solid foundation for the next steps in this project.
Consultation with Professionals: Ensuring a Safe Laundry Chute Removal
Introduction
The journey to remove a laundry chute involves more than just physical dismantling. One of the crucial steps is consulting with professionals, particularly when the chute might intersect with your home's heating or cooling systems. This part of the blog delves into why professional advice is indispensable and how to go about it.
The Intersection of Laundry Chutes and HVAC Systems
Identifying Potential HVAC Connections
In some homes, especially older ones, what appears to be a laundry chute could actually be part of the heating, ventilation, and air conditioning (HVAC) system. These chutes may have been repurposed over time or mistakenly identified. Removing such a chute without proper assessment can disrupt your home's climate control and even lead to expensive repairs.
The Importance of Professional Assessment
A heating and AC technician can provide a thorough evaluation to determine if the chute is integral to your HVAC system. They have the expertise to understand complex heating and cooling networks, which can be particularly convoluted in older or uniquely designed homes.
How to Consult with an HVAC Professional
Finding the Right Expert
Seek out a licensed and experienced HVAC professional. You can do this by checking local business directories, seeking recommendations from friends or neighbors, or looking at online reviews. Ensure that the technician has experience with older homes, as they are more likely to have encountered similar situations.
What to Expect During the Consultation
During the consultation, the technician will likely inspect the chute, its entry and exit points, and how it relates to the overall structure of your home. They might use specialized tools to track the path of the chute and determine if it's connected to your HVAC system.
Understanding the Technician's Recommendations
Possible Outcomes
If the chute is part of the HVAC system, the technician will advise against removal or suggest alternatives, such as sealing or rerouting parts of the system. If it's not a part of the HVAC system, you'll get a green light to proceed with the removal.
Asking the Right Questions
During the consultation, it's important to ask questions. Inquire about potential risks, alternative solutions, and any other concerns related to the removal. Understanding the rationale behind the technician's advice is crucial for making informed decisions.
Conclusion
Consulting with HVAC professionals is a critical step in the safe removal of a laundry chute. It ensures that you do not unintentionally disrupt essential systems in your home. With their expertise, you can proceed with the removal process confidently, knowing that you've taken all necessary precautions to maintain the integrity and safety of your home's infrastructure.
Physical Removal: The Step-by-Step Guide to Dismantling a Laundry Chute
Introduction
Once you have assessed the laundry chute's structure and consulted with professionals, the next phase is the physical removal. This process, often perceived as daunting, can be managed effectively with the right approach and tools. This section will guide you through the steps of safely removing a laundry chute from your home.
Preparing for Removal
Gathering Necessary Tools
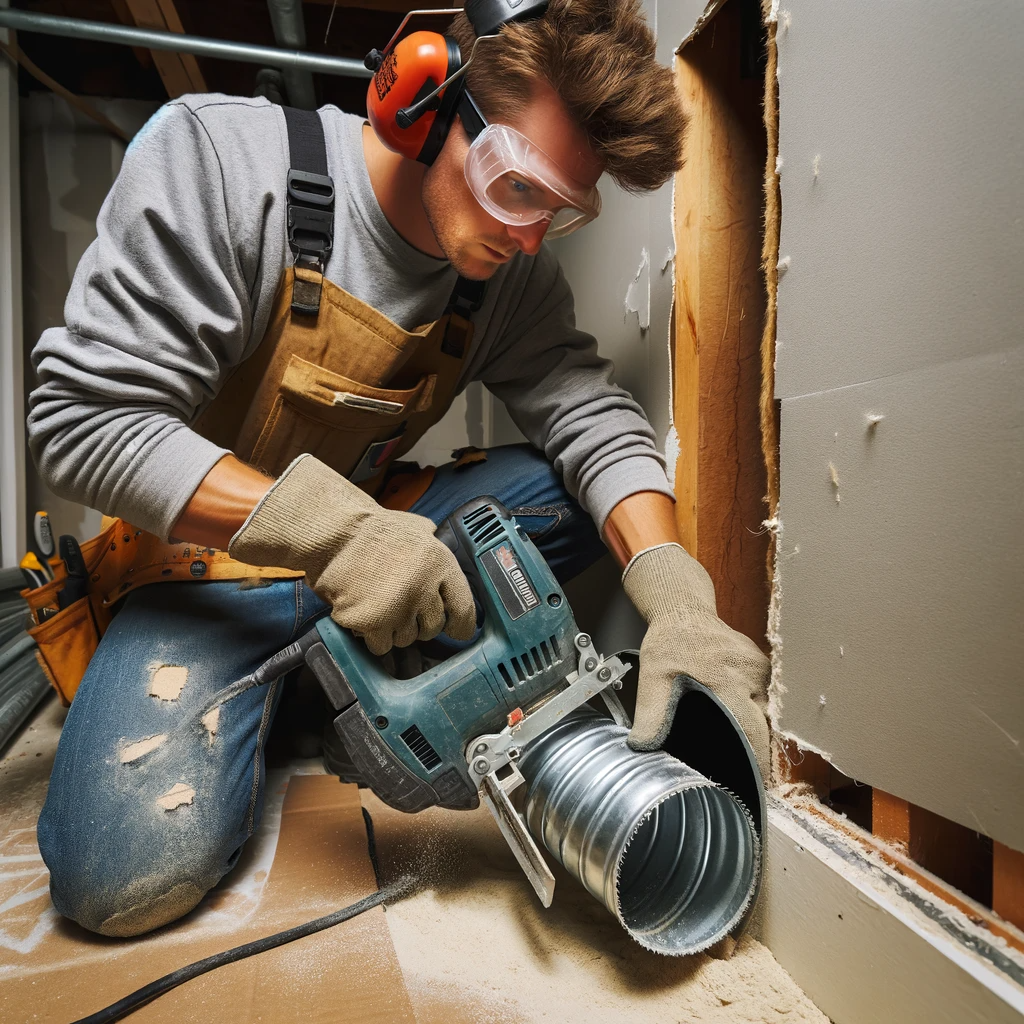
To begin, you'll need a set of tools typically including a reciprocating saw or a hand saw, a screwdriver, pliers, a utility knife, and protective gear like gloves and goggles. It's important to wear protective gear to prevent injuries from sharp edges or debris.
Securing the Area
Before starting, clear the area around the chute of any furniture, decorations, or other items. Cover the floor and nearby objects with drop cloths or plastic sheeting to protect them from dust and debris. Ensure that the work area is well-lit and free of obstacles.
Cutting Out the Chute
Assessing the Cutting Points
Identify where you need to make cuts to remove the chute. If it’s surrounded by drywall, you may need to cut through the drywall to access the chute. Use a stud finder to locate any studs and avoid cutting into them.
Making the Initial Cuts
Using the saw, carefully make the initial cuts around the chute. If it's made of metal, a reciprocating saw with a metal-cutting blade is ideal. For wooden chutes, a hand saw might suffice. Be cautious of any electrical wiring or plumbing that may be concealed within the walls.
Removing the Chute
Dismantling in Sections
If the chute is large, consider dismantling it in sections. This approach makes it easier to handle and reduces the risk of damaging your home's structure. Remove any screws or fasteners holding the chute in place.
Pulling Out the Chute
Once the chute is cut free from its surroundings, carefully pull it out. This step might require some force, especially if the chute is large or has been in place for a long time. Be prepared for the chute to be heavier than it looks, and consider having assistance for this part.
Dealing with the Aftermath
Disposing of the Chute
Once the chute is removed, you’ll need to dispose of it properly. Check with your local waste management services for guidelines on disposing of large items like this.
Repairing the Affected Areas
With the chute gone, you'll be left with gaps in the walls or ceiling. These need to be sealed for insulation and aesthetic purposes. You may need to install new drywall, apply joint compound, sand, and paint to restore the area.
Conclusion
The physical removal of a laundry chute requires careful planning, the right tools, and a methodical approach. By following these steps, you can safely and efficiently remove your laundry chute, paving the way for the next phase of your home renovation or restructuring project.
Handling Structural and Insulation Issues: Post-Removal Restoration
Introduction
After successfully removing a laundry chute, the next critical phase is addressing the resulting structural and insulation issues. This part of the process ensures that your home remains energy-efficient, safe, and aesthetically pleasing. Let's explore the best practices for sealing gaps and restoring the affected areas.
Sealing the Gaps
Assessing the Openings
First, evaluate the size and location of the openings left by the chute removal. These gaps can vary in size, and their positions might present unique challenges, especially if they span multiple floors or are located in hard-to-reach areas.
Choosing the Right Insulation
Selecting appropriate insulation material is crucial. Fiberglass batt insulation is commonly used for its effectiveness and ease of installation. For larger gaps, spray foam insulation might be a better option, as it expands to fill the space and provides excellent thermal and sound insulation.
Installing the Insulation
Cut the insulation to fit the opening precisely. If you're using fiberglass batts, ensure they fit snugly without being compressed, as this can reduce their insulative properties. For spray foam, follow the manufacturer's instructions carefully to ensure a safe and effective application.
Repairing the Drywall
Preparing the Surface
Once the gaps are insulated, the next step is to repair the drywall. Start by cleaning the area around the opening and trimming any rough edges. If the opening is large, you may need to install drywall patches or new sections of drywall.
Installing New Drywall
Measure and cut the drywall to fit the opening precisely. Secure it in place using drywall screws, ensuring it's flush with the existing wall or ceiling surface. For larger sections, support the drywall with additional framing or backers.
Finishing the Drywall
Apply joint compound over the seams and screw heads, then use drywall tape to cover the seams. Once the joint compound dries, sand it smooth. Repeat the process with additional coats of compound as needed, sanding between each layer for a smooth finish.
Painting and Final Touches
Priming and Painting
Prime the repaired area to ensure even paint coverage. Once the primer is dry, paint the area to match the surrounding wall or ceiling. It might take a couple of coats to achieve a seamless look.
Reinstalling Trim and Fixtures
If the removal process involved taking down trim, baseboards, or fixtures, now is the time to reinstall or replace them. Ensure that they are securely attached and blend well with the rest of the room.
Conclusion
Handling structural and insulation issues after removing a laundry chute is a meticulous process that restores your home's integrity. By carefully insulating and repairing the affected areas, you not only maintain the aesthetic appeal of your home but also its energy efficiency and structural soundness. With these steps, the space once occupied by the laundry chute will seamlessly integrate into the rest of your home.
Size and Location Considerations: Navigating Challenges in Chute Removal
Introduction
The ease of removing a laundry chute is significantly influenced by its size and location within your home. Understanding these factors and preparing for the associated challenges is essential for a smooth and efficient removal process. This section of the blog focuses on strategies to tackle these varying circumstances.
Evaluating the Size of the Chute
Small Chutes
Smaller chutes, while seemingly easier due to their size, can pose unique challenges. Their compact nature often means they are fitted into tighter spaces, making access for tools and removal more difficult. They might also be harder to grip and maneuver out of the wall or floor.
Large Chutes
Larger chutes can be cumbersome to handle. Their size may require partial dismantling within the structure for safer and more manageable removal. Additionally, larger chutes increase the area of the wall or ceiling that needs repair post-removal.
Considering the Location
Accessible Areas
Chutes located in easily accessible areas, like garages or utility rooms, can be simpler to remove. These locations often allow more room to maneuver and may not require as much cosmetic restoration afterward.
Inconvenient Locations
Chutes in inconvenient locations, such as between tightly spaced walls, above staircases, or in finished areas of the home, present more challenges. These situations may require additional tools or techniques for safe removal and might involve more extensive repair work to the surrounding area.
Strategies for Difficult Removals
Planning for Tight Spaces
In tight spaces, using smaller, more maneuverable tools can be effective. It's also helpful to plan your approach carefully, considering how each section of the chute will be removed and where debris will fall.
Preparing for Obstacles
When chutes are located near obstacles like plumbing or wiring, extra caution is needed. Plan to have contingencies in place in case of accidental damage, and consider consulting with professionals if the risk is high.
Addressing Aesthetic Concerns
In areas where the appearance post-removal is a concern, like in main living spaces, plan for thorough cosmetic restoration. This might involve matching paint, textures, and other interior finishes to seamlessly blend the repair with the existing decor.
Conclusion
The size and location of a laundry chute are critical factors that affect the removal process. By understanding and preparing for these aspects, you can tailor your approach to ensure a successful and damage-free removal. Careful planning and the right techniques can overcome the challenges presented by different sizes and locations, leading to a smooth and effective removal process.
Need Help Removing a Laundry Chute - Maybe We Can Help!
Embarking on the task of removing a laundry chute can be daunting, but you're not alone in this endeavour - we're here to help! With a wealth of experience and a deep understanding of the intricacies involved, our team is equipped to guide you through every step of the process. From assessing the structure and potential complications to safely dismantling and repairing the affected areas, we provide comprehensive support. Whether your chute is a compact duct in a tight space or a large conduit spanning multiple floors, our tailored solutions and expert advice ensure a smooth, efficient, and safe removal process. Let us help you transform your space and address any challenges you might face in removing your home's laundry chute. Contact us about removing a laundry chute today.